Tuesday, December 28, 2010
The end of the beginning.
Wednesday, February 10, 2010
Pâte Brisée and Crème Pâtissière
With this afternoon off I figured I would take some recipes for a test drive(with adaptations in consideration of a certain vegetarian I know and love). So here is what I came up with:
I started with the pate brisee (pat bree zay) recipe (there are supposed to be accents but for some reason I cannot cut and paste from the bit map into the composition field, so I apologize in advance to all perfectionists out there reading this. Haha, like anyone is reading this!) This is the first recipe I made on the first day in the bakeshop at school. I think I will always love it for that. Below is Chef Roux's version:
Pate Brisee (adapted from Pastry: Sweet & Savory by Michel Roux):
1 3/4 cups (250g) all-purpose flour
2/3 cup (150g) butter, cut into small pieces and slightly softened
1 tsp (6g) fine salt
pinch of superfine sugar
1 medium egg
1 tbsp (15ml) cold milk - I needed a splash more
"Heap the flour on a counter and make a well. Put in the butter, salt, sugar, and egg [btw, you do want your butter softened a bit, I didn't and it was a pain!]. Using your fingertips, mix and cream these ingredients together.
Little by little, draw in the flour, working the dough delicately until it has a grainy texture.
Add the milk and incorporate gently with your fingertips until the dough begins to hold together.
Using the palm of your hand, work the dough by pushing it away from you 4 to 5 times until smooth. Roll it into a ball, wrap in plastic wrap, and chill until ready to use."
There is a recipe in the book for Cornish Pasties. It calls for chuck steak, potatoes, rutabaga, and onion in a clamshellesque pate brisee shell. I substituted Quorn "Chik'n Tenders" for the chuck steak and peas for the rutabaga and added curry and cumin in an attempted samosa-type filling. The result? Not bad!

I had some extra pate brisee and some fruit, so I decided to practice creme patissiere (pastry cream) with the recipe in Chef Roux's book:
Creme Patissiere (Adapted from Pastry ; Savory & Sweet)
makes about 1lb. 10oz (750g)
- 6 medium egg yolks
- 1/2 cup + 2 Tbsp (125g) superfine sugar [take table sugar for a ride in the
food processor] - generous 1/4 cup (40g) all-purpose flour
- 2 cups (500ml) milk -- [this is 1 pint or 1 lb of milk btw]
- 1 vanilla bean, split lengthwise [I just added the imitation stuff after the
final boil] - a little confectioners' sugar or butter [you won't need this btw, unless you
really want to follow the recipe letter for letter]
"Whisk the egg yolks and one-third of the sugar together in a bowl to a light ribbon consistency [er..kind of hard to describe this. Basically whisk it until it turns a pale yellow, thickens, and starts to "pile" on itself in a ribbon pattern when you pour it.] Whisk in the flour thoroughly. [btw, at school we use corn starch in place of flour. It thickens much faster, but I actually enjoyed the flavor of this recipe far more].
In a pan, heat the milk with the rest of the sugar and the vanilla bean. As soon as it comes to a boil, pour it onto the egg yolk mixture, stirring as you go. [If you are using the vanilla bean, I would remove it, scape the seeds, and return them to the milk before pouring it on the egg yolk
mixture. Oh, and pour the milk into the yolk mixture slowly. You don't want to cook the eggs.] Mix well, then return the mixture to the pan. Bring to a boil over medium heat, stirring continuously with the whisk. [Seriously, stir the bejesus out of it or it will burn. Make sure your pot is large enough for vigorous stirring and make sure to get into the corners. I want to try this in a saucier to see if it helps..] Let bubble for 2 minutes, then pour into a bowl.
Dust the creme patissiere with a veil of confectioners' sugar to prevent a skin forming as it cools, or dot small flakes of butter all over the surface. [Or skip this entirely and just put plastic wrap right against the surface... its much easier] Once cool, it can be kept in the refrigerator for 3 days. Remove the vanilla bean before using."
With this creme patissiere, the left over pate brisee and some fruit, I was able to make some dessert for Sarah and I. They were very tasty if I do say so myself.

Monday, January 18, 2010
A tight ship
1. Scaling - As I said in my previous post, most professional bakers scale their ingredients as it is more accurate and easier. You might also call this Mis en Place which is French for "everything in its place" or something to that effect. It basically means that you gather all the ingredients before you start on the procedure.
2. Mixing - Just as it sounds. Read the directions though, each recipe has its own way to mix. Some want the water in the bowl first, some will add preferments after the autolyse, some want the salt last, etc. If you don't know what autolyse is, go ahead and google it.
3. Bulk Fermentation - As my chef says, this is the second of the 5 fermentations that your bread undergoes. "Wait, what happened to the first one" you ask. The first would be what we call "pre-ferments" such as bigas, poolish, sourdough, levain, pate fermentee, etc. These you would prepare as part of your mis en place. They usually require 12-18 hours of fermentation time. You can begin to see how scheduling becomes essential. Anyway, back to the bulk fermentation. This varies with the recipe. For most breads we prepare at school, the full bulk fermentation time is 90 minutes. Some breads, however, such as pain au levain, take 2-3 hours. Read the recipe.
4. Punching - This is a bit misleading. I don't know why they call it punching, because the actual action you take is more like folding. For us, most 90 minute bulk fermentations have this step 60 minutes into the fermentation. Some breads are different, such as ciabatta, which you fold every 30 minutes. Punching, or folding if you prefer, does several things. It relaxes the gluten for more final stretch. It distributes the yeast throughout the dough. Gasses are released and temperatures are made more even throughout the dough. All of these are important for the final volume and quality of the bread.
5. Scaling - Basically, you are chopping up the dough into the size of the final bread. For instance, for rolls, you would divide the dough up into 1.5 ounce pieces. For baguettes we general scale out 1# (lb) of dough. Larger loaves can be anywhere from 1 1/2# or larger. I think a third quarter scaled her miche at 5#. The idea is that by scaling your doughs, your loaves will be of uniform size. We actually use an antiquated looking balance scale for this, although a digital scale would be just as fine.
6. Rounding - When you scale your bread, it tends to activate the gluten strands in the dough and makes forming the final dough a bit tough. As an intermediate step we round the scaled dough into balls or oblongs called "boules" (French for ball). These can be tight boules or loose boules. You would use round boules for round loaves or for flat breads such as focaccia. You would use the oblongs for baguettes or batards.
7. Benching - you know how I said that scaling (and rounding) activates the gluten strands of your dough? Well benching is basically a resting period in which these strands relax enough for you to be able to form your dough into its final form. Benching generally takes 15-20 minutes but you want to feel the dough to make sure. Poke it. If it feels soft and the indent doesn't spring back immediately, you can move on to
8. Make-up - or forming if you prefer. This is where you form your boules into their final form for the oven. Make-up varies a lot for different breads. I won't even try to describe them all. Usually we just ask the chef. If you want, you can check out some baking books or try YouTube for some different make-up techniques, although you might get videos on applying eye-liner or something. In any case, make-up is important to the final bread results. If your make-up is incorrect or you don't place your seems in the right places, you can end up with some odd shapes in your final product.
9. Proofing - The second to last fermentation step for your breads. Proofing varies by what you are making but basically you put your finally formed breads (in couches or in banetons - google away!) in a warm humid area and let them ferment so they are not squishy when you poke them. Kind of the opposite of what you are looking for when benching, the indent (by the way, don't poke them hard, be gentle with your doughs once you start the proofing process) should spring back or the dough will sort of resist indenting. You will have to feel the dough to know exactly what I am trying to describe here. So much of bread baking is feel...
10. Baking - Once the proofing is done you have to GENTLY transfer your bread to however you are baking it. We have a cool deck oven with a huge gurney-looking device called a loader that delivers the bread into the oven. Here is a video of a similar loader:
http://www.youtube.com/watch?v=c2JG0x0n304
If you watch the video you can see a guy doing something to the tops of the breads. He is scoring the dough (very quickly) which is important for "oven spring" which is the rapid expansion of trapped gases and the final fermentation of the yeast which will die once the temperature hits about 140 degrees F. Oven spring is also aided by the introduction of steam which keeps the crust of the bread from pre-maturely forming and reducing the final volume. Steam also helps add more color to the crust as it bakes (for more on this google maillard reaction). There are also other reactions that occur as the temperatures rise in the dough, which is quickly transforming into bread. Proteins coagulate and starches gelatinize between 140 degrees F and 160 degrees F. For more info on what goes on in the oven see this article :
http://home.earthlink.net/~ggda/temperature_control_baking_1.htm
11. Cooling - As it sounds. In order for the structure of the bread to harden into its final form it must cool adequately. In other words, you have to wait a bit to eat it if you want it right.
12. Storing - This seems like a cheap "step" to include in baking, but its important. A process of "Starch Retrogradation" occurs as soon as you take the bread out of the oven. As the bread cools, molecules in the bread that have liquefied during baking, start to recrystallize in the presence of the moisture in the bread and turn the bread crumbly or "stale". This is exacerbated by cold temperatures in a refrigerator but halted in a freezer (the water molecules are frozen and therefore cannot react with the amylose and amylopectin molecules in order for them to form crystals..yay google!). So, long story short, don't refrigerate breads, freeze them. Or just eat them right away. Once they are cooled anyway.
So as you can see, with these steps in mind, it becomes a bit of a trick juggling all the steps when making, say, 4 different breads. Below is a link to a typical schedule in the breads rotation:
http://spreadsheets.google.com/ccc?key=0AlZ7mLdoY5-8dEpwV1VVbEVqM2Nta3RFdjdLVFJjN2c&hl=en
So it is not as easy as it all sounds. We have had some failures but mostly successes. Most importantly, I have learned a great deal, and I still love it.
Monday, December 28, 2009
Equipment corner
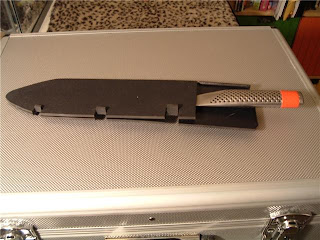
What, exactly, am I looking at you ask? Well that is my global 8 inch chef's knife in its new sheath from http://www.culi-tool.com/ sitting upon my tool kit for school. I finally received this thing after some serious waiting (the guy at culi-tool apparently forgot about the order, but did refund money because of the wait. He seems like a fantastic guy and honest to boot.) and am very happy with it so far. It seems like the perfect thing for culinary school, but I don't know if it is too geeky to actually wear your knife on your belt. I guess I will see if they all laugh at me or if they are all jealous. It seems like a handy thing to me, so maybe I don't really care what they think.
Well, the idea here is to talk a bit about essential equipment. This is going to be a bit of an overview as anything in depth would be far too lengthy to read. Perhaps later in the blog I will give my opinion on cookware, knives, and other sundries. For now, I was thinking of just a list of things you should have in your kitchen. As for us culinary students, our kits look something like this:
 Well, I have to say, my case is fairly unique. Most culinary students carry around something that looks more like this:
Mine is literally just a tool briefcase I purchased at Home Depot with some customization. Eventually I plan to rivet some other modifications into the darn thing, but I need to get a rivet gun first and work out what exactly I want to do. Anyway, the carrying case is a bit beside the point. What tools it carries is more important. As I am in the Desserts and Breads program, my kit is going to be a bit different than the standard culinary student's kit, so don't take my word as law for anything. As for the home kitchen, here is what I think you should have:
1. First and foremost to me in any kitchen is your chef's knife. If you are going to invest your money anywhere, invest it here. I have two 8 inch chef's knives, one by Global and one by Shun. In the past I have also owned an 8 inch Henckels chef knife which I liked at the time. The chef's knife is the most versatile instrument in the kitchen to me. I use it every day. Well, I could talk forever about this, so look for future posts on the topic. For now, suffice it to say that this is the heart of your kitchen. Don't skimp.
The rest of these are in no particular order. I find them all important and somewhat essential.
- Tongs - yes, it seems simplistic, but I love tongs. Screw the fancy wooden salad fork and spoon gift set, give me a pair of tongs in a salad bowl any day of the week. Screw the stupid pasta fork thingy, give me the tongs. Screw the carving fork, give me the tongs. Skimp away here, by the way. A pair of tongs is a pair of tongs. No need for anything fancy.
- Bench scraper - I love this tool. Strangely enough, I use it the most for cleaning, but its great for scooping chopped veg, or for cutting dough into portions, or for chopping butter. Again, nothing fancy is needed here.
- Frying pan - Ok, I will probably also spend another blog post on cookware some time in the future, but I consider the most important cookware in the kitchen to be the frying pan. I guess the saucepan is also fairly essential as they do entirely different things. I will talk more about non-stick and all that later. This is one of those things I wouldn't skimp on by the way. There is a huge difference between the cheap crap you can get at Target and the professional cookware you get from restaurant supply stores. Spend the money, it matters.
- Kitchen scale - I know, I know, it seems like something you can do without. Trust me on this, especially if you plan to do even moderate baking. A scale is essential. Get one that can convert between metric and imperial. Get one that can tare (this means you can reset the weight to zero as to add-on more items to whatever is on the scale). I have an Oxo Good Grips scale with a pull out display. It is fast and accurate.
- Half sheet pan - You need at least one. If you have an oven that can handle a full sheet pan, I hate you and you should should get full sheet pans and half sheet pans. A couple of things to go with this - a cooling rack and parchment and/or a silpat.
- Paring knife - You can't do everything with a chef's knife. Some things require a smaller blade. Don't go crazy. Something simple with suffice.
- Bread knife - the one serrated blade I recommend in the kitchen. Get one long enough to cut through a 12 inch round cake.
- Carving knife - ok, the last knife I will recommend for now. I would suggest one fairly long for the larger cuts of meat. I also recommend a graton edge to help while carving. Again, I will discuss knives more in-depth later.
- Wooden spoons - Super cheap and great for stirring or scraping fond from your frying pan. I usually go cheap, but since I have broken a rubber scraper and a wooden spoon this xmas while stirring fudge, I think I will spend the couple extra dollars for a the stronger spoons in the future.
- Rubber scraper - speaking of which, get a rubber scraper. I like the clear silicon ones for no particular reason other than they do not melt as easily and the stains are not so apparent. I can also see more clearly when they weaken and need to be replaced. Again, I will be looking for sturdier handles after the fudge debacle this year.
- Measuring spoons, cups, etc. - While I like the scale for most applications these days, I still require at least a teaspoon measure, a cup measure, and a tablespoon measure. I would go stainless steal with sturdy handles. I prefer the deeper spoons to the shallow ones. Longer handles can come in handy.
- Thermometer - you need this. You do. Get one with a range big enough for candies and frying (think -40 degrees F to 500+ degrees F). I recommend digital and perhaps one that doubles as a timer. I have a Thermopen which I adore as well as 4 others.
The not so essentials, but stuff I still love:
- prep bowls - I have a ton of bowls in the kitchen. I have glass/ceramic ones of various sizes that are ok in the microwave. I have stainless steel ones that I can use either directly over heat or as double boilers. I recommend all sizes from as small as 1/4 cup to as big as, I donno, 2 gallons?
- mixer - expensive I know, but I love my Kitchen Aid. I would go 6 quart (the one with the bowl that can be lifted and lowered, vs the one with the tiltable head). Once again, I would say skip this one unless you are willing to spend the money for the Kitchen Aid or better.
- food processor - while we are talking electronics, I love the food processor. I can chop most things on my own, but the food processor is definitely a plus when it comes to making mayo or dressings or purees.
- cling wrap - I know, not good for the environment. If you are uber conscious of such things, by all means skip it, but I use this stuff all the time for food preservation, for splatter guards while tenderizing, and as an aid when shaping certain things like barrages and my home-made pop-tarts.
Ok, so really this list could go on forever, but these are what I can think of now. I am undoubtedly forgetting some essentials, but this is a good start. I would ask for recommendations, but as of now, this blog feels very much like me spouting off incoherent blather to a limitless void. I wonder, sometimes, how Molly and Julia ever actually became noticed within the vast ocean that is the blogosphere. Ah well, if nothing else, it acts as an interesting journal to which I can return when I am feeling nostalgic. And perhaps some day someone will find some use of this all. You never can tell...
Friday, December 25, 2009
Croissant Xmas
---------------------------------------------------------------------------------------------
Professional Baking by Wayne Gissling pg. 198:
Croissants
Milk - 225g (I use metric, as I find it much easier for conversions. The editors apparently don't as I will get to later.)
Yeast, fresh - 15g (note..I don't have fresh yeast. What home baker does? I use instant dry, which has to be converted at 33% instant dry for 100% fresh. In other words, 5g)
Sugar - 15g
Salt - 8g
Butter, softened - 40g
Bread flour - 400g (closest I had was AP. I figured the high gluten flour I have would probably not go over well with croissants)
Butter - 225g (this is for the barrage, aka the big pat of butter you roll into the dough and then fold)
Mixing: Straight dough method.
Scald the milk (ok,first of all, for those who don't know, scalding is heating the milk to 180 degrees F. I did this but ended up burning some of the milk on the bottom of the pan which then sent chunks floating when I stirred. I strained these, but in retrospect, I probably should have just started with new milk. I have this thing about wasting food; I can't stand it. Anyway, I don't think this is the reason for my failure, we will turn to that in a minute. As a fun side note, the reason you scald milk in bread recipes is because it destroys an enzyme natural to milk that inhibits gluten formation. Yes, folks, he can be taught!), cool to lukewarm, and dissolve the yeast (I skipped this, as I was using instant yeast. The dissolving part that is, I still cooled it, which took forever). Add the remaining ingredients except the last quantity of butter. Mix into a smooth dough, but do not develop the gluten. Gluten development will take place during rolling-in procedure. (And here is my mistake. I took "do not develop the gluten" to mean mix the ingredients until just combined. As it turns out, the "smooth dough" they talk about is more like 10 minutes into the mixing. At least I know what happens when a croissant dough is undermixed. Failure...that's what happens. For those interested, it means that the dough is incredibly stiff and will not easily roll out, unless of course you are stubborn as hell like I am and do actually get 3 turns on it and a final roll. The dough layers will tear easily and the butter layers which are supposed to remain separated will combine into a sloppy mess which is incredibly difficult to shape and which yields an end product destined for the din heap.)
Fermentation: 1 - 1 1/2 hours @ 75 degrees F
Punch down, spread out on a flat pan, and rest in refrigerator or retarder 30 minutes.
Rolling in: Incorporate the last amount of butter and give 3 three-folds. Rest in retarder overnight.
Makeup:
See page 205 (there are pictures on this page which depict how to roll out and shape the croissants. Basically roll out to 1/8 - 1/4 inch thick, cut into triangles and roll into croissant shapes. There are some technical skills here which would be hard to describe. Suffice it to say, don't smoosh the centers while shaping.)
Proof at 75 degrees F and 65% humidity (I think I messed this up too, not that it much mattered after the original mistake. I put them in my bathroom with the shower running to create steam for the proofing but it was too warm with too much moisture. Butter melts at about 85 degrees, so too high a proofing temp can lead to premature butter seepage mixed with a gelatinous outer crust. That just sounds nasty..). Egg wash before baking.
Baking 400 degrees F (at least I got this part right...)
--------------------------------------------------------------------------------------------
Well, at least I had the instinct to realize something was amiss with my croissants. Previous incarnations had never been as stiff as this dough was nor torn so readily. I punted just in case and baked up a batch of fairly simple hard crusted dinner rolls. This would have been much easier at 6am this morning after two hours of sleep if the editors had bothered to check the metric measurements for the recipe. The recipe called for 750g of water to 625g of flour. I should have realized the impossibility of this for a hard roll dough, but like I said, I was sleepy. Apparently the editors had failed to catch that the conversion of 13 oz of water is not actually 750g, but 368.5 g. That is not just a little mistake, that is monumental. Luckily the soup that I had mixed from the original recipe was easily fixed by doubling the dry ingredients. Unluckily the new sized dough was too big for my 5 quart mixer so I was forced to split the dough and develop the gluten for both separately. All turned out well, however, and the rolls were a smashing success. I am sure the roaches at the dumpster will be overjoyed at the failed croissants. You and me will meet again soon croissants.... and next time, I am kicking your ass!
Next time I will talk about tools and this little beauty:

Tuesday, December 1, 2009
There will be bread
The start of my breads rotation was not auspicious. Our first task was to feed the levain. What seemed simple enough turned into disaster. For those who are not quite up on the terminology, a levain is a natural yeast starter similar to a sourdough starter. Basically you follow a procedure to build your levain "mother" and if you feed her and keep her happy she can produce for you indefinitely. There are claims by some bake shops to have levains or sourdough starters that are decades old. Anywho, to feed the levain you basically take a piece of the "old levain" and add water and flour to it and either use the remainder for bread or if it has acidified (become too sour) you discard it. Well, I weighed out the portion for our new levain and discarded the remainder in the compost while my partner weighed out the water. I then set about oiling a fresh container for the levain while my partner mixed the new batch. Checking in on her, she expressed some consternation at the consistency of the levain and wondered why it seemed so wet. Perhaps, she mused, I had not weighed the flour correctly? At this point I expressed that I had not weighed any flour at all, eliciting a face of greatest fear from her. Apparently she had grabbed what she thought I had set out as our weighed flour and what, as it turned out, had been someone else's flour...mixed with whole wheat flour...and salt...and commercial yeast...
At this point, the full gravity of the situation came crashing in on us, and our chef instructor. We had ruined the levain in the bowl (commercial yeast, and salt, and probably whole wheat flour will do that). The remainder of the levain was in the compost. Well, cover you eyes here all you squeamish folks. We pulled the mother from the compost. Yes we did. Sorry, I know its gross, but it would have meant a week, at least, without product. The chef washed it off and thank goodness it was on the top of the pile and not completely smothered in who knows what.. There was thankfully enough to begin anew. The moral of the story:
1. Mis en place your own shit or at least check with any partner you are working with that all ingredients are correct.
2. Don't discard any levain before the new one is started.
Sigh..at least there will be bread. Oh, and I got to stick my fingers into boiling sugar today. Flex!
Monday, November 30, 2009
Sur la Table work is still going well, albeit sparse, which may be a good thing. I can only handle so many hours of feeling like a used car salesman. Did you ever get annoyed with the overzealous sales guy who asks you if you are from out of town or what you plan to do with the rest of your day? Just so you know, we are trained to ask questions that cannot be answered with a simple yes or no. Its not as easy as it looks, especially for someone who doesn't really enjoy the hounding clerk who seems overly friendly. That said, you would be amazed how some people do open up with the littlest of small talk.
UPS called and left a message on the cell phone. It seems they have a job they would like to offer me, for minimum wage. Only the promise of constant work and some good benefits (hello tuition reimbursement!) are keeping me interested. I draw the line if they ask me to forgo the catering work I already have lined up for this week. We will see...
I start my breads rotation tomorrow! My final first quarter rotation and what I have been anticipating the most. I can't wait to learn some forming techniques and I do hope to get my hands on the 10 foot long peel. The bread conveyor that looks like a mortuary gurney is also something I want to get my hands on. I can't wait!
My hopes to work at Dalancey were dashed today. It appears that Brad and Molly have hired their two pantry cooks. On the plus side, Molly apparently has extricated herself enough to return to the blog. Hurray for new posts! I may be a bit bitter, but really I hope they do well. There is something about Delancey that is an inspiration for me. Not that I want to own a restaurant, but something about just sticking your neck out for something you believe in and having the warm embracing response that they have received makes me think I, too, can reach for a dream and maybe, possibly, someday attain it.
